A full Guide to LED Wall Installation
April, 2023 by Frank
Explore the steps for LED screen installation for multiple installation ways, and useful tips to ensure a smooth installation process.
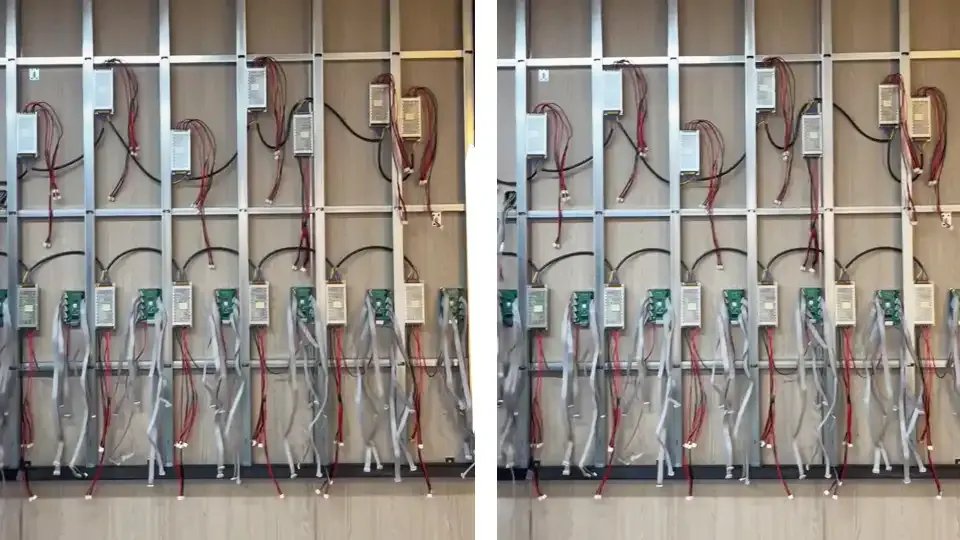
Indoor LED Display Installation without Cabinet
This installation way involves utilizing individual LED modules mounted directly onto a frame, providing a flexible and customizable solution for various environments. It also eliminates the need for bulky cabinets, allowing for a more streamlined appearance and easier integration into existing architecture. However, you have to assemble LED modules, LED powers, LED receiver cards, and other components.
- More cost-effective because it reduces cabinet-related material costs.
- By adjusting in module increments, the display size can be precisely controlled, whereas cabinet-based installations are limited to fixed cabinet dimensions.
- Fully utilize LED receiving cards and LED power supplies, as cabinet-based installations allow the cards and power supplies to be used in a single cabinet.
- LED screens appear simpler and slimmer.
- Assembling all components requires more labor and costs.
- Without a protective cabinet, LED modules are more susceptible to potential damage from impact or environmental factors.
- This process is more complex, requiring precise alignment and secure connections.
- Maintenance costs and time are higher.
- Large screens may experience a loss of flatness.
- Suitable for indoor installations only.
Next, we will explore the process for implementing indoor LED display installations without the use of cabinets.
Step 1: Prepare all Necessary Materials
First, we need to prepare all materials. This is a complete material list for an indoor LED screen installation where the LED modules are mounted on a frame.
- Ethernet cables
- AC Power Cables
- RED Black Power Cable - LED Module
- Flat Signal Cable -16P
- GOB LED modules
- LED Receiver Card - DH7512-S
- LED Controller
- LapTop
- Bolts / Wrench
- Rectangular Tube 40*40mm / 40*20mm
Step 2: Make & Install Steel Frame
Once all the materials are ready, the next step is to make the steel frame.
This is a crucial step in LED installation.
Know more information about the LED Wall Structure
Calculate the Size of LED screen
The design of the frame should be adapted to the size of the LED module.
For example, assuming the LED module you are using is 320*160mm in size, the size formula is as follows:
Height =Quantity of LED modules in vertical * LED modules height
Weight=Quantity of LED modules in horizontal* LED modules Width
To calculate the height of the LED screen, multiply the number of LED modules arranged vertically by the height of each module. For instance, if there are 5 modules stacked vertically, each measuring 0.16 meters, the total height of the screen would be 0.9 meters.
Similarly, the width of the LED screen can be determined by multiplying the number of horizontal modules by the width of each module. If there are 10 modules arranged horizontally, each with a width of 0.32 meters, the total width of the screen would be 3.2 meters.
Accounting for Gaps
Generally, you need to consider the slight gaps and seams that occur between modules and the frame, typically around 10mm. These gaps can affect the overall dimensions of the frame, so it’s important to add the total potential spacing to both the vertical and horizontal calculations.
Final LED WALL Frame Adjustments
After calculating the total height and width, including the gaps, the final frame dimensions can be determined. In our example, the final size of the whole frame should be:
Width: 3200mm + 10mm = 3210mm
Height: 900mm + 10mm = 910mm
Building the LED WALL Steel Frame
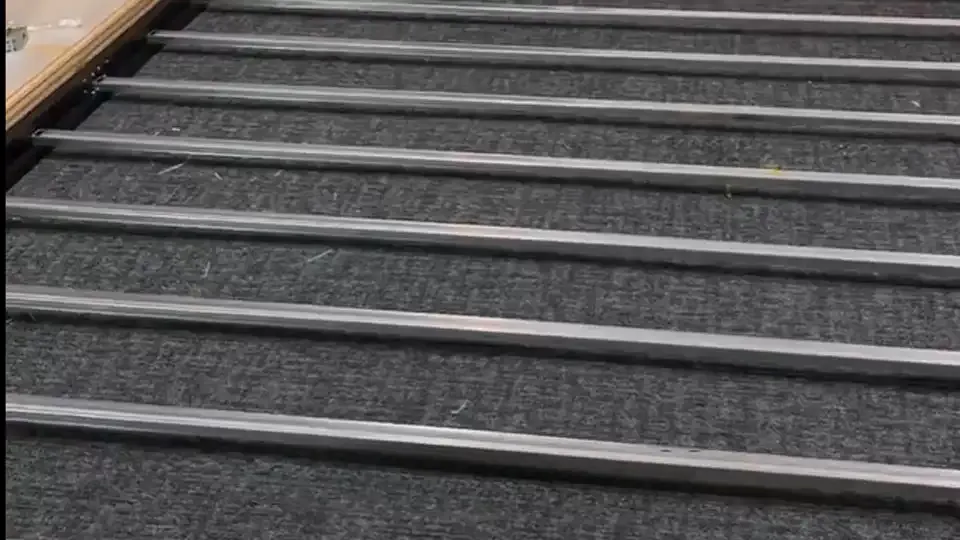
After we have calculated the size of the frame, you can now welding steel structure with rectangular tubes, which is generally 40x40mm or 40x20mm size.
Each module and power supply contributes to the overall weight, so it’s important to ensure that the frame is robust enough to support the total weight of the LED display.
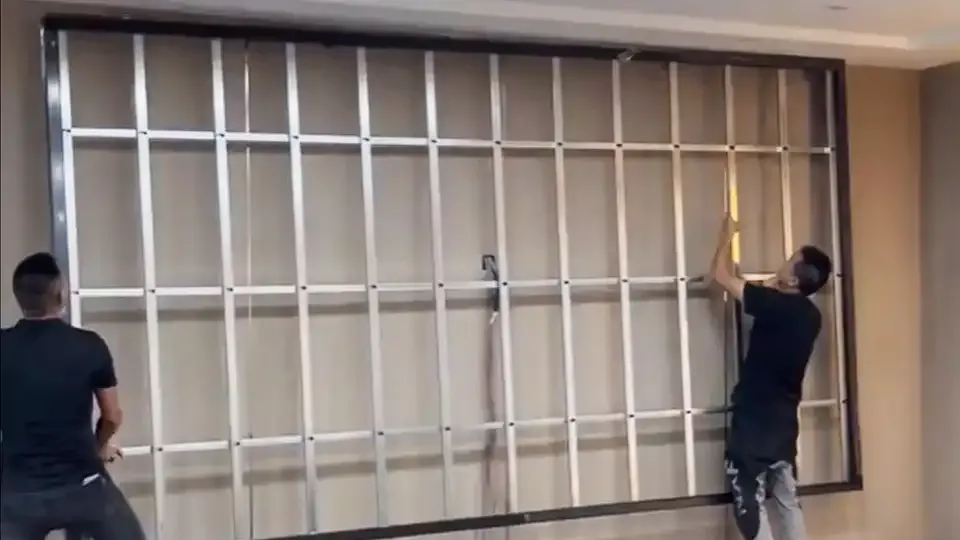
Installing the LED WALL steel structure
Once the steel structure is welded, we need to mount it to the wall. First, align the frame with the marked reference points and secure it in place using heavy-duty bolts and anchors. Next, ensure each connection is tight and the frame is level, making any necessary adjustments before fully tightening the bolts.
Once the frame is securely installed, a final inspection is recommended to confirm that it is stable and properly aligned.
Step 3: Install the Power Supply
After the steel frame is mounted on the wall, the next step is to install the power supply.
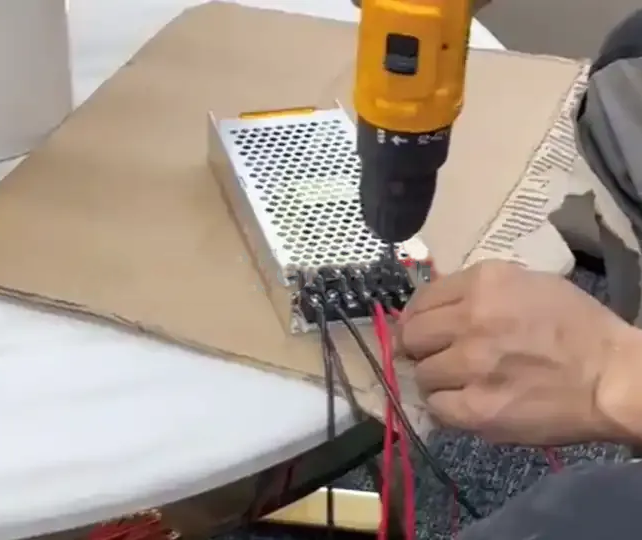
Connecting DC 5V cable to the Power Supply
Before mounting the power supply on the steel frame, we need to connect the DC5V cable to the power supply.
Making this connection before installation can significantly simplify the process, especially if the power supply is located at an inaccessible height. By connecting the DC5V cable to the ground, you can ensure a safe and efficient installation and reduce the risk of errors when working in confined spaces.
Typically, the DC5V cable consists of two wires: a red cable for the positive connection and a black cable for the negative connection. To connect, connect the red cable to the "+" terminal of the power supply output and the black cable to the "-" terminal.
Installing the Power Supply to the Steel Frame
After securely connecting the DC 5V cable to the power supply, you can install the power supply on the steel frame.
First, we need to calculate the load on the power supply and determine the number of LED modules it can support horizontally and vertically based on its capacity.
Generally, you can follow the following guidelines:
A 200W AC power supply (5V, 40A, 200W) can support 4 LED modules.
A 300W AC power supply (5V, 60A, 300W) can support 6 LED modules.
Next, you need to determine the location of the LED power supply based on the number of LED modules required horizontally and vertically.
Once the location is determined, we can securely fasten the power supply to the rectangular tube with fixing straps or mount it on the side of the tube or on the wall using fixing brackets (with screws) and self-tapping screws.

In additional, please ensure the connections should be secure and that power supply is adequately grounded to prevent any electrical issues.
Connecting AC Cables
Once installation is complete, you can connect the AC power cables from the mains to the power supply, ensuring that all electrical safety regulations are followed.
To connect the AC power cables to the power supply, first connect the power supply to the circuit breaker terminals on the distribution board. You can then connect adjacent power supplies in a chain configuration, simplifying power distribution among multiple devices.
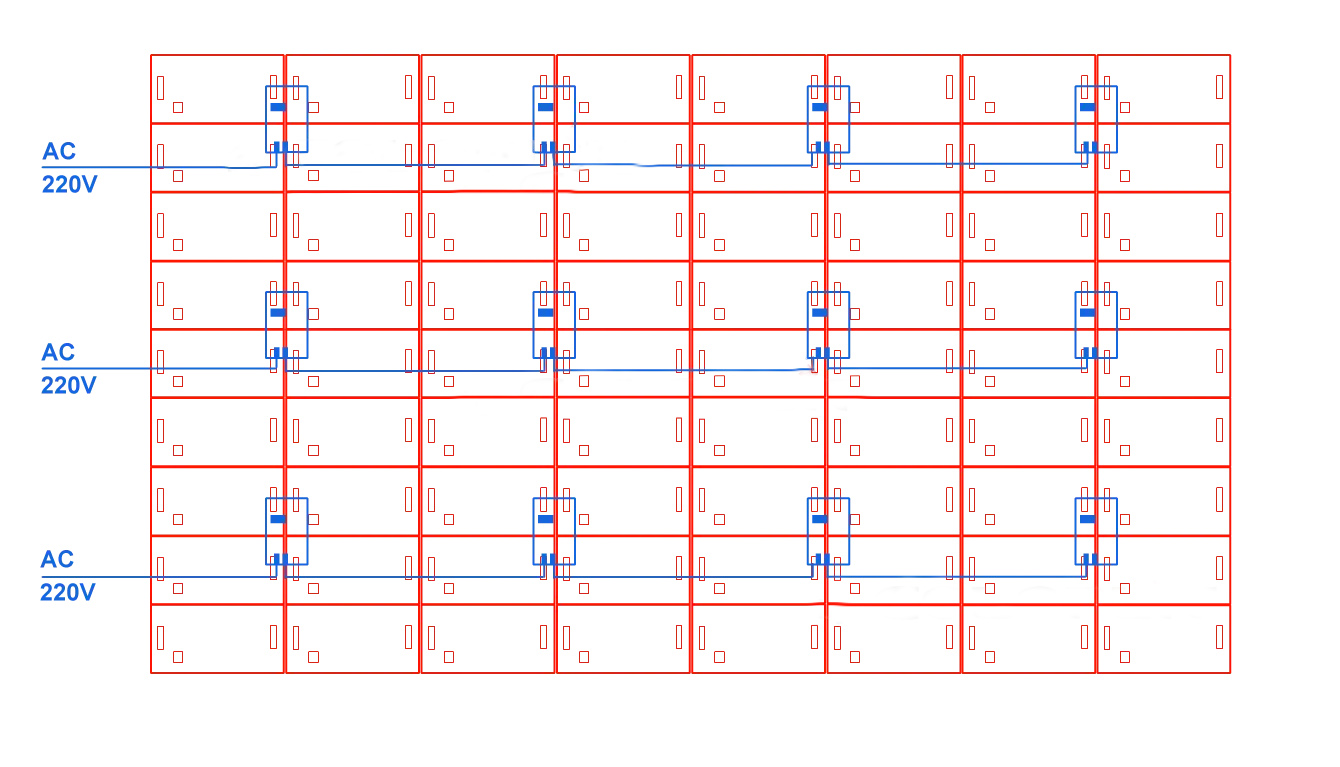
Be sure to use three-core 2.5mm² cables for these connections, which can support up to twelve 300W power supplies.
If your equipment exceeds this capacity, you'll need to connect another power supply using an additional AC cable and re-establish a power chain. When connecting power supplies, be sure to ensure all connections are secure and well-insulated to prevent any electrical hazards.
Step 4: Install LED Receiver Cards & Cables
The installation of the receiving card is a key step to ensure the normal operation of the LED display and the reception of necessary data signals.
Connect Flat cable to Receiver Card
Typically, before installing the receiver card onto the steel frame, we should first connect the flat signal data to the card. using pin interface J1, J2, J3, J4… etc. the qunaity of interface depeond on the receiver card, you need to check the corresponding specification from the manufacture.
Also, you need to follow the connection ways according to the order of the configuration file which is mostly given by the LED supplier.
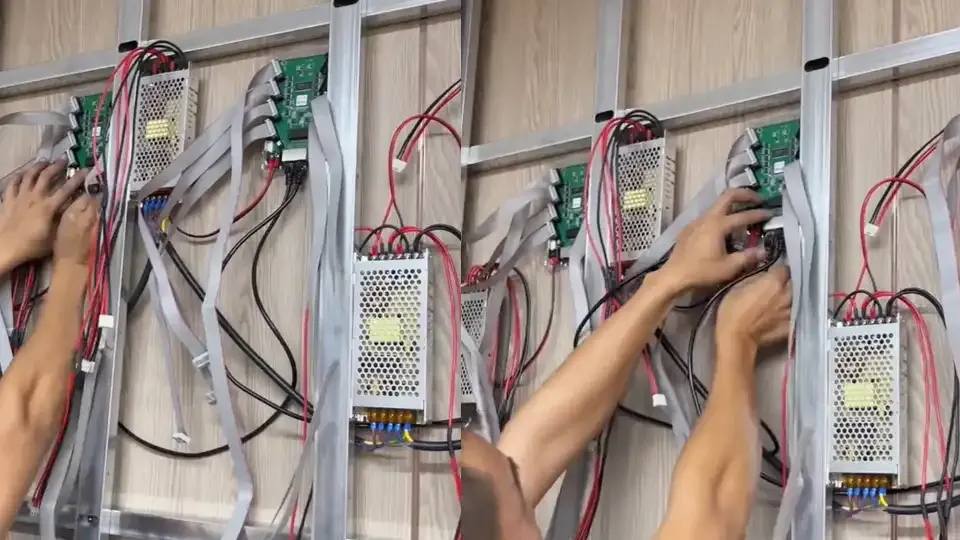
Install Receiver Card to the Steel Frame
Once the receiving card and all cables are assembled, the next step is to mount them to the steel frame.
Obviously, it's best to secure the receiving card to a designated location on the steel frame, usually near a power source, for easier cable management. Also, check the length of the DC power cables connected in the previous step; they should be long enough to reach the power source without strain or deformation.
Similarly, you can secure the receiving card to the side of the rectangular tube using mounting straps or mount it to the wall using mounting plates and screws.
Install Receiver Card and DC5V Power to the Steel Frame
Connect Ethernet cable
After the receiving card is installed on the steel frame, you can connect the network cable or Ethernet cable to the receiving card to ensure seamless communication between the LED display modules.
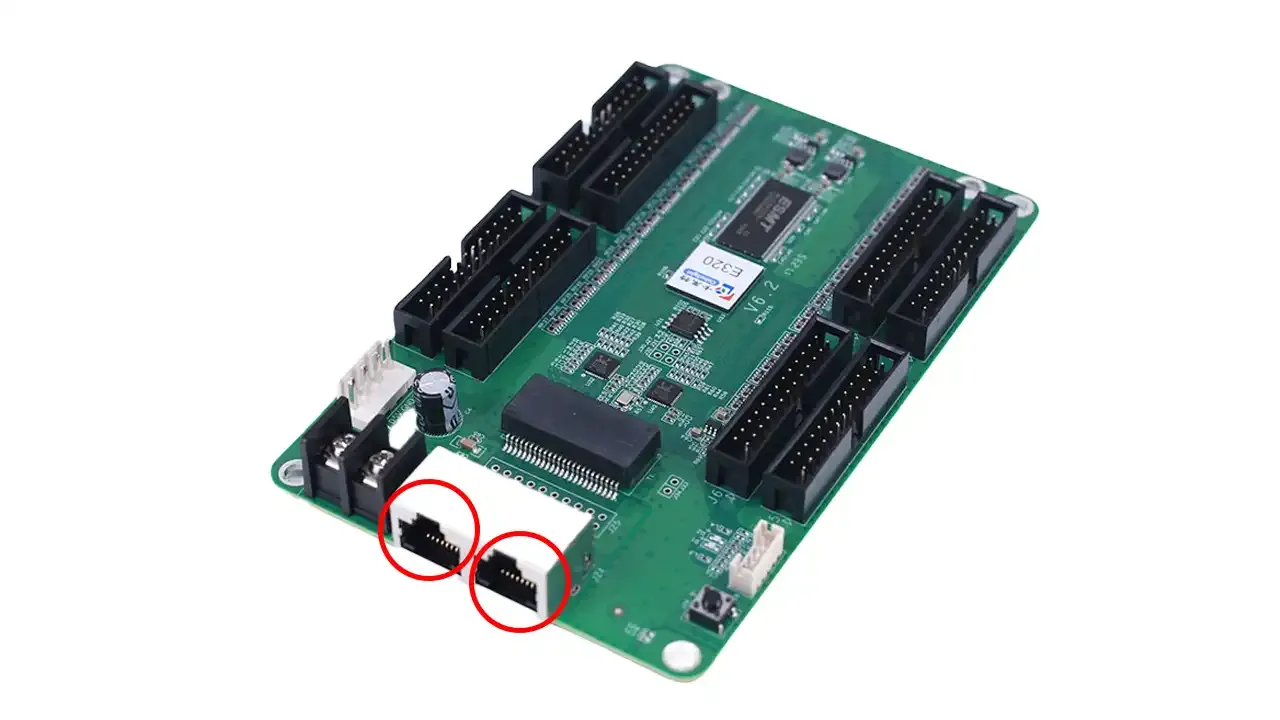
Connect Ethernet cable to the led wall data receiver card
The wiring process typically involves connecting the output of one receiving card to the input of the next. Typically, there are two Ethernet ports, and you can connect an Ethernet cable from one port on one receiving card to one port on the next receiving card in the same series. If there is a wiring diagram, follow the specified connection sequence.
After all Ethernet connections are made, it's crucial to perform a final verification of the entire setup. Check each connection point to ensure that the cables are secure and show no obvious signs of damage.
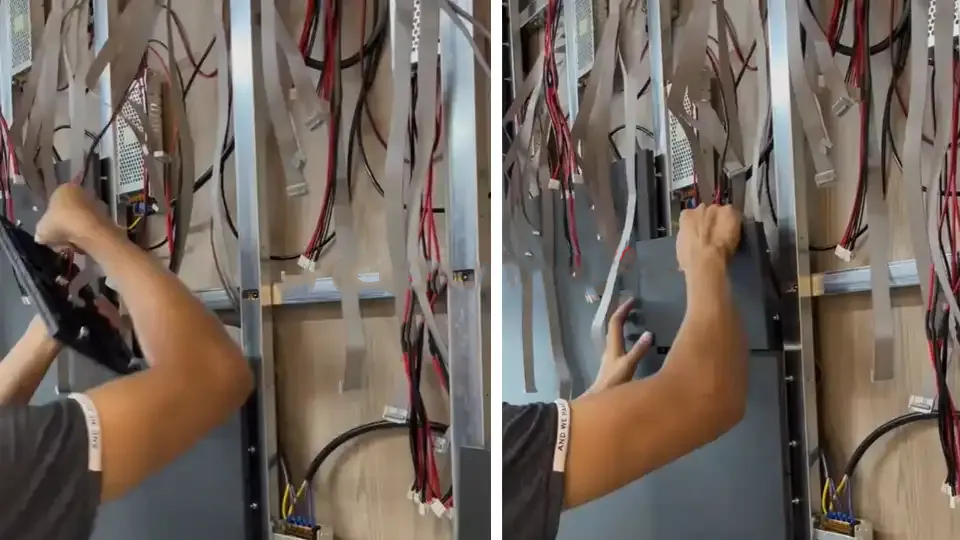
Step 5: Install LED Screen / LED Wall Modules
Before mounting the LED screen modules directly onto the steel frame without a cabinet, it is important to ensure that the frame is clean and free of debris so that it can be aligned correctly. In addition, we also need to assemble the modules with magnets before proceeding to the next steps.
Installing the LED screen modules
Next, we can install the LED modules in one corner of the frame and secure each module with appropriate brackets. We also need to connect the flat cable from the receiving card and the DC5V cable from the power supply output. When mounting the modules on the steel structure, ensure that the arrow on the back of each module points upward and to the right. Also, check that there are no gaps between the modules to ensure a seamless and tight fit.
Key Considerations for the LED Wall - LED Module Installation
- Test all connections between the LED modules connected to the receiving card to ensure they are correct before installing additional LED modules.
- Use cable ties to keep the cables neatly arranged and prevent tangling.
- During installation, be aware of any unevenness in the screen.
- Ensure there are no gaps between adjacent modules.
After all modules are installed, please conduct a thorough inspection of all LED modules to ensure there are no flatness issues.
Step 6: Configure LED Screen | LED WALL
After the LED modules are securely mounted on the steel frame, the next step is to configure and test the LED screen to ensure optimal performance.
Power on the LED screen. Press the test button on the receiving card. The screen will display the following information one by one:
- Red color
- Green color
- Blue color
- Line
- Field
- Aging
After that, the next step is to configure the receiving cards and connect the display.
You'll need to access the display's configuration software, which is typically provided by the manufacturer. You can also import a vendor-provided configuration file for easier operation. Carefully follow the instructions in the configuration software to map the receiving cards to their physical locations on the steel frame.
After configuration and mapping are complete, a comprehensive test is conducted to ensure that the LED screen operates as expected. Finally, after configuration is complete, a unified image for the large screen is created.
Useful Tips - LED WALL Installation
- Understand the dimensions: Determine the overall dimensions of the display, the dimensions of each module, the total number of modules, and the number of power supplies and receiving cards.
- Reduce the risk of impact: Take precautions to avoid impacting the edges of the screen to prevent LED modules from falling or being damaged.
- Understand the power load: Understand the power load requirements of each module and ensure that the power supply is rated to safely handle the total load.
- Organize cables: Use cable ties to organize all power and data cables to reduce clutter and the risk of accidental disconnection.
- Check connections: Before powering up the system, carefully check all connections to ensure they are secure and correctly configured.
- Test before final installation: Before final installation, perform a preliminary test to verify that all modules are functioning properly.
- Maintain ventilation: Ensure adequate airflow around the display to prevent overheating of the modules and power supply.
- Maintain maintenance plan: Consider accessibility for future maintenance tasks and ensure all components are easily accessible when needed.
LED WALL Instalaltion Conclusion
In this article, we've reviewed the key steps for installing an LED display without a cabinet, emphasizing the importance of preparation and careful configuration. We've also covered some practical tips for ensuring a smooth installation, such as connecting cables, installing LED modules, and efficiently installing receiving cards.
We've also explored detailed steps for various installation methods. By following these guidelines, you can install a reliable and aesthetically pleasing LED display that meets your project needs. If you have any questions about LED display installation, please feel free to contact us.
Home > LED Wall Blog > Full Guide to LED Screen | LED Wall Installation